|
Saute the veggies in the butter for 5 minutes or until everyone notices something smells amazing. It is this point you will want to add some of the other seasoning as well. Start with a teaspoon of each.
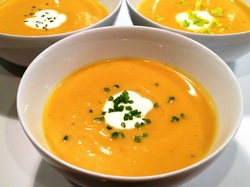
Add water enough to cover the veggies and the chicken breast or carcass. Bring to a rapid boil stirring enough to prevent sticking on the bottom of the pot. As that boils the, squash should be finished up. Spoon the good stuff out of the squash into a bowl. It should be soft enough to do this easily. Scrape as much from the peel as you can. Feel free to taste some as you do this. Poor the left over water from the squash pans into the soup pot. After all the squash is spooned away from the skins put it in the soup pot. Once again, add enough water to just cover everything. If you used a chicken carcass now is the time to remove it and debone it. This is also the time to add the diced Heirloom Tomato. You can remove the skin of it if you want, but not necessary. Keep this at a medium boil for about 45 minutes. This time allows the flavors to meld and gives you time to clean up your mess in the kitchen so far. Once the mess is cleaned up lower the heat to low and add the cheese. It is best if you break it into small pieces or shred it. Keep stirring until all the cheese is melted and slowly add half of the milk while stirring. The milk smooths out the texture and lightens the color. Now that all the ingredients are together use some sort of hand or wand mixer to emulsify the soup. This blends it all together and makes a nice smooth texture. This is also when I like to taste it and add the rest of the seasonings to taste. I find a little more salt and sage gives it a nice pop at the end. The longer you blend the smoother it gets. At this point you will want to remove it from the heat. Portion into bowls or cups and top with a dollop of Creme Fraiche, the fresh sage and crisped shallots. To achevee the crisped shallots, slice it very thin and saute over medium heat with butter until browned. Enjoy!
1 Comment
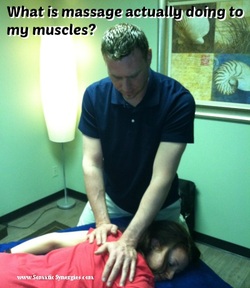
 Hello again! This week, a client asked me what the effect the technique I was using had on her muscles. I realized there is a lot of information on the benefits of massage out there but little in the way of what it is actually doing to the tissue. I am going to try to explain some simple principles most massage therapists rely on to gain all those great benefits so you can see that there is much more going on than just relaxation and stress relief. Without being too technical, I will talk about three commonly used techniques and why we use them. The first technique people feel when receiving a massage is usually some sort of sliding or gliding movement. These strokes cover the entire body part being worked on, are usually rhythmical in nature, and used at the beginning and end of each body part. Initially, this technique is used to spread out our oil or lotion and begin warming the tissue. As the tissue warms, it gets more pliable, circulation increases, and we can feel the knots and tensions easier. This stroke is also an assessment technique to begin finding areas that may need more attention. One of the biggest benefits; however, is how this technique engages our nervous system. It starts to slow down our nerve impulses and gets us out of the "fight or flight" system and into the "rest and digest" system. Lastly, this movement is used to flush the tissue after more aggressive work. This is done in a toward the heart direction and can greatly reduce the soreness after a massage. After warming the tissue, pressing or squeezing techniques are used. These are very slow or sometimes do not move at all. These are the techniques we use to go after those knots and pesky contractions that cause pain and dysfunction. When a muscle is in a contracted (flexed) state, matching its level of resistance can usually get it to start to relax. Sometimes it takes a few seconds, sometimes a few minutes. I like to look at it as causing it to work harder until it gives up. Most contractions causing pain are a reflex or guarding response to some sort of over-use or injury to the tissue. These techniques can disengage that reflex when used properly. Once the guarding response is stopped, easier, more efficient movement is possible. The last technique I will talk about is passive and active movements. These are when your therapist stretches you, has you move on your own, or has you resist against something. Movement techniques are performed after the other techniques and are used to re-educate the muscles and nerves. When muscles are tight, they limit movement. The previous techniques break everything up and stop the contraction process. These movements allow the connective tissue to expand and shows the nerves that there is a new possibility for motion. They help the other work stick. Many other techniques are used at different times depending on what we find in the tissue, but these are the big three. We even combine them at times. If you are ever wondering why or what your therapist is doing, don't be afraid to ask! We are usually more than happy to let you know what we are doing and why. I hope this helps shed a little light on what is going on in your tissue and muscles when you receive bodywork. Thanks for tuning in and Happy Holidays!!!!!!!!!!!! |
Archives
April 2023
Categories
All
|
Office Phone |
|
Address441 Wadsworth Blvd Ste 206
Lakewood, CO 80226 |
Map |


 RSS Feed